Hey there! In this article, I’ll walk you through a step-by-step tutorial on creating a YouTube intro video using Canva. Canva is an online tool that offers a variety of options for creating intros, and I’ll demonstrate exactly how you can use it to create your own. I’ll also provide additional content ideas for YouTube and blog posts, as well as information on getting approved for affiliate networks. Plus, I’ll share examples of my own success with affiliate commissions and Clickbank sales. I’ll even recommend some great products and demos that can enhance your YouTube experience. Just keep in mind that the video is brought to you by VIDSociety and may contain affiliate links. So, if you’re looking to dive into the world of YouTube intros, this tutorial is for you!
Hey, this is Chris with Vid Society! In this video, I’m going to show you how to create captivating YouTube intro videos using a free online tool called Canva. I’ll provide you with the step-by-step instructions on how to set up a free Canva account and search for YouTube intro templates. Canva is super user-friendly and offers a drag and drop editor that allows you to easily customize the templates with text, images, animations, and more. You can even add your own audio or use Canva’s built-in audio options. Once you’re finished, you can share your intro using a generated link or download it as an MP4 video. Canva automatically saves your designs, making it simple to go back and edit or create new intros. So, whether you’re a beginner or experienced YouTuber, Canva is a fantastic tool to add some flair to your videos.
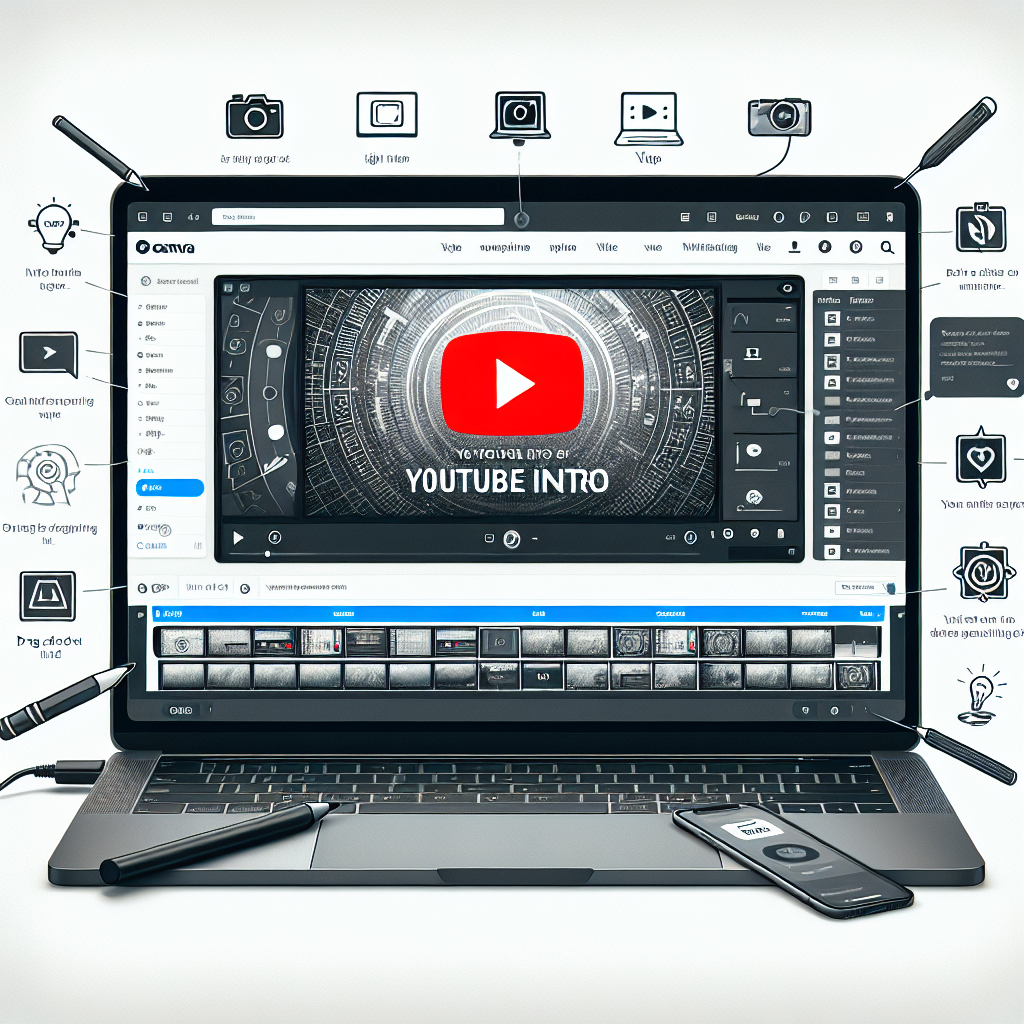
Step 1: Introduction to Canva
Overview of Canva
Canva is an online tool that provides various options for creating YouTube intro videos. It offers a wide range of templates, graphics, and resources to help users design professional and eye-catching intros for their YouTube channels.
Benefits of using Canva for intro videos
Using Canva for YouTube intro videos has several benefits. Firstly, it offers a user-friendly drag and drop editor, making it easy for anyone, regardless of their design experience, to create high-quality intros. Canva also provides a vast library of templates designed specifically for YouTube intros, allowing users to choose from a variety of styles and themes. Additionally, Canva’s extensive collection of images, graphics, and animations enables users to customize their intros and make them unique.
Free version vs. premium version
Canva offers both a free version and a premium version. The free version provides access to a limited number of templates and resources, making it a great option for beginners or those on a tight budget. On the other hand, the premium version offers a wider range of templates, media, and resources, providing more options and flexibility for users who want to take their intros to the next level. The premium version does require a monthly subscription fee, but it can be a worthwhile investment for creators looking to elevate the quality of their intros.
Step 2: Setting up a Free Account
Creating an account
To get started with Canva, you need to create an account. Visit the Canva website and click on the “Sign up” button. You can sign up using your email address, Google account, or Facebook account. Follow the prompts to set up your account and provide any necessary information.
Logging in to Canva
Once you have created your account, you can log in to Canva using your chosen login method. Simply visit the Canva website and click on the “Log in” button. Enter your login credentials and click “Log in” to access your Canva account.
Exploring the Canva dashboard
After logging in, you will be taken to the Canva dashboard. The dashboard is where you can access all the tools and features Canva has to offer. Here, you will find options to create designs, browse templates, and manage your saved projects. Take some time to familiarize yourself with the layout of the dashboard and explore the different sections to get a better understanding of what Canva has to offer.
Step 3: Searching for YouTube Intro Templates
Accessing Canva’s template library
To find YouTube intro templates in Canva, navigate to the template library. From the dashboard, click on the “Create a design” button. In the search bar at the top of the page, type in “YouTube intro” or a related keyword to filter the templates specifically for YouTube intros.
Filtering templates for YouTube intros
Canva’s template library offers a wide variety of templates, so it’s essential to narrow down your search to find YouTube intro templates specifically. You can do this by using the search bar to filter the templates or by browsing the different categories and selecting the “YouTube Intro” category.
Choosing a suitable template
Once you have accessed the YouTube intro templates, take some time to explore the options available. Canva offers a range of styles and themes, so choose a template that aligns with your channel’s branding and the message you want to convey. Click on a template to preview it and see if it suits your needs. When you find a suitable template, click on it to select it and start customizing.
Step 4: Customizing the Chosen Template
Understanding Canva’s drag and drop editor
Canva’s drag and drop editor is a powerful and intuitive tool that allows you to customize templates easily. The editor consists of a canvas where you can see and edit your design elements. To make changes, simply click on an element, and a toolbar will appear, offering various editing options.
Editing text in the template
To edit text in the chosen template, click on the text element you want to modify. A text toolbar will appear, allowing you to change the font, size, color, and alignment of the text. You can also edit the actual text content by typing directly into the text box.
Modifying images and graphics
To modify images and graphics in the template, select the element you want to change. You can replace the current image with your own by clicking on the “Replace” button in the toolbar. Canva also provides a vast library of images and graphics that you can choose from if you don’t have your own. Simply click on the “Elements” tab on the left-hand side and select the category that best fits your needs.
Adding animations and effects
Canva offers various animations and effects that you can add to your intro video to make it more dynamic and engaging. To add animations, click on the element you want to animate, and select the “Animate” option from the toolbar. You can choose from a variety of animation styles and customize the duration and timing of the animation. Experiment with different effects to find the ones that best complement your intro.
Step 5: Adding Audio to the Intro Video
Exploring Canva’s built-in audio library
Canva provides a built-in audio library where you can find and add music or sound effects to your intro video. To access the audio library, click on the “Audio” tab in the left-hand panel. Browse through the available options and click on a track to preview it. Once you find a suitable audio clip, drag and drop it onto the canvas to add it to your intro.
Uploading your own audio
If you prefer to use your own audio for your intro, Canva allows you to upload your own audio files. Click on the “Uploads” tab in the left-hand panel and click on the “Upload your own media” button. Select the audio file you want to upload from your computer, and it will appear in your uploads library. You can then drag and drop the audio file onto the canvas to add it to your intro.
Syncing audio with the visual elements
To ensure that the audio syncs with the visual elements of your intro, you can adjust the timing of the audio. Click on the audio clip on the canvas, and a toolbar will appear. Use the toolbar to trim the audio, adjust the volume, and align it with specific points in your intro. Preview your intro to make sure the audio and visuals are in sync.
Step 6: Finalizing the Intro Video
Previewing the customized intro
Before finalizing your intro video, take some time to preview it to ensure everything looks and sounds just right. Click on the play button on the canvas to preview your intro and make any necessary adjustments.
Making any necessary adjustments
If you notice any issues or areas that need improvement in your intro video, go back to the editing stage and make the necessary adjustments. This could involve tweaking the text, changing an image, or adding additional effects. Canva’s drag and drop editor makes it easy to make these changes quickly and efficiently.
Choosing the video resolution and format
Once you are satisfied with your intro video, it’s time to choose the resolution and format in which you want to save it. Canva offers various options to accommodate different platforms and preferences. From the toolbar, click on the “Download” button, and a dialog box will appear. Select the resolution and format that best suit your needs.
Saving the intro video
After selecting the desired resolution and format, click on the “Download” button, and Canva will process your intro video. Once the processing is complete, the video will download to your computer, ready for use.
Step 7: Sharing and Downloading the Intro Video
Generating a shareable link
Canva allows you to generate a shareable link for your intro video, making it easy to share it with others. To create a shareable link, click on the “Share” button in the toolbar. Canva will generate a unique link for your video that you can copy and share with others via email, social media, or any other platform.
Downloading the intro video as an MP4 file
If you prefer to download the intro video and have it saved on your computer, Canva provides the option to do so. Simply click on the “Download” button in the toolbar and select the resolution and format you want for your video. Canva will process the video, and once it’s ready, you can download it as an MP4 file.
Options for sharing on social media platforms
Canva makes it easy to share your intro video on various social media platforms directly from the editor. Click on the “Share” button in the toolbar, and you will see options to share your video on platforms like Facebook, Twitter, and Instagram. Simply select the platform you want to share on, and Canva will guide you through the process.
Step 8: Saving and Managing Designs in Canva
Understanding Canva’s autosave feature
Canva has an autosave feature that automatically saves your designs as you make changes. This ensures that you don’t lose any progress or modifications you’ve made to your intro video. You can rely on this feature to save your work, but it’s always a good idea to periodically save your design manually.
Accessing and organizing saved designs
Once you have created and saved your intro video, you can access it from your Canva account. On the Canva dashboard, click on the “All your designs” button to view all your saved designs. From there, you can organize your designs into folders, rename them, or delete them as needed. This feature helps you keep your designs organized and easily accessible.
Editing or creating new intros using saved designs
If you want to make changes to your intro video in the future or create new intros using a similar design, Canva allows you to edit or duplicate your saved designs. Simply click on a design from your saved designs, and Canva will open it in the editor. You can then make any necessary adjustments or modifications to suit your needs.
Step 9: Additional Content Ideas for YouTube and Blog Posts
Exploring the variety of content ideas
Creating engaging and valuable content is essential for building a successful YouTube channel and blog. Canva offers more than just YouTube intro templates; it provides a plethora of resources and ideas for various types of content. You can explore Canva’s template library to find inspiration for video thumbnails, channel art, end screens, blog graphics, and more.
Creating engaging and valuable videos
To create engaging and valuable videos, consider the interests and needs of your target audience. Research popular topics and trends within your niche and provide valuable insights, tutorials, or entertainment in your videos. Canva’s templates and resources can help you create visually appealing videos that capture and retain viewers’ attention.
Tips for optimizing YouTube videos for better reach
Alongside creating compelling content, it’s crucial to optimize your YouTube videos for better reach and visibility. Some tips for optimizing YouTube videos include:
- Using keyword-rich titles and descriptions
- Adding relevant tags to your videos
- Optimizing thumbnails for click-through rates
- Encouraging audience engagement through likes, comments, and shares
- Promoting your videos on your blog and social media platforms
Conclusion
Summary of Canva’s features for creating YouTube intro videos
Canva is a valuable tool for creators looking to make YouTube intro videos. Its wide range of templates, drag and drop editor, and extensive library of resources make it easy for anyone to design professional and engaging intros.
Encouragement to start creating professional intros using Canva
If you haven’t already, give Canva a try for creating your YouTube intro videos. With its user-friendly interface, customizable templates, and multitude of features, you’ll be able to create intros that captivate your audience and set the stage for your content.
Promise of more valuable tutorials and resources
Remember, this article is just the beginning. There is so much more you can do with Canva and other tools to enhance your YouTube channel and blog. Stay tuned for more tutorials and resources that will help you take your content creation to the next level and achieve even greater success.